Search Tak Thoughts

Monday, December 20, 2021

Blog Neglect, but Not Content or Community Abandonment

 Good evening everyone!

So, I got to thinking today that I haven't posted anything on here since my Artificer's set was finished and thinking of this made me realize that, unless you came to this blog via the Discord, you might think that the Artificer's Set became sentient and has me locked in the garage, making spare parts for it :)

This is just a short note on the front page to let you know that the community is still active and I am actively creating content within it, but those items usually end up on the Tak Talk Discord in the form of puzzles and conversation, or in the USTA quarterly newsletter.


Thanks for reading! Happy Takking!


P.S. In addition to the Discord (rabbitboy84), I can still also be reached via Reddit (u/rabbitboy84) or email (bill.leighton1@gmail.com).

Sunday, June 6, 2021

The Artificer's Travel Tak Set - First Fully Working Version!


After months of tinkering, it is finished! This project offered me many hours of entertainment and really kept my gears turning:) 

Everything except the outer board artwork and the decorations on top of the capstones was designed by me. This required becoming refamiliarized with InkScape for 2D drawing and learning FreeCAD for the 3D design. I also learned Cura as my slicing program and figured out how to get these programs to interface with my Snapmaker 2.0.


For those that want to see the beginning of the process, here is the blog post. I just finished posting videos to my Instagram and decided to put something into long form to go a bit more in depth on each part of this set.


Board


I used a wooden placemat with a canvas backing that I found on Amazon for the board. I cut it down to size and used the laser engraver on my Snapmaker to decorate the outside and burn the board grid on the inside canvas. In the future, I may 3D print or cut the slats myself so that I can more easily control quality and integrate the magnetic and physical end cap attachment points. The canvas has a bit of memory to it as well. So, if you leave it rolled up for any length of time, you have to stretch the fabric back out to get it to lay flat. Not ideal for a travel set which will spend the majority of its life in a rolled state. If I make this part myself in the future, I will choose a different fabric.


Flat Pieces

My first pass at the pieces was overly complicated. I designed a cog and then on the flat faces, made a rotational groove in the shape of the side of the cog so that a standing stone could rest securely on top. My 3D printer did okay with this, but the detail wasn't stellar, and I took another pass at it after having used FreeCAD for another couple months and mulling things over. I settled on a simpler design, but one that keeps (and in fact improves) the stability of a standing stone on top.
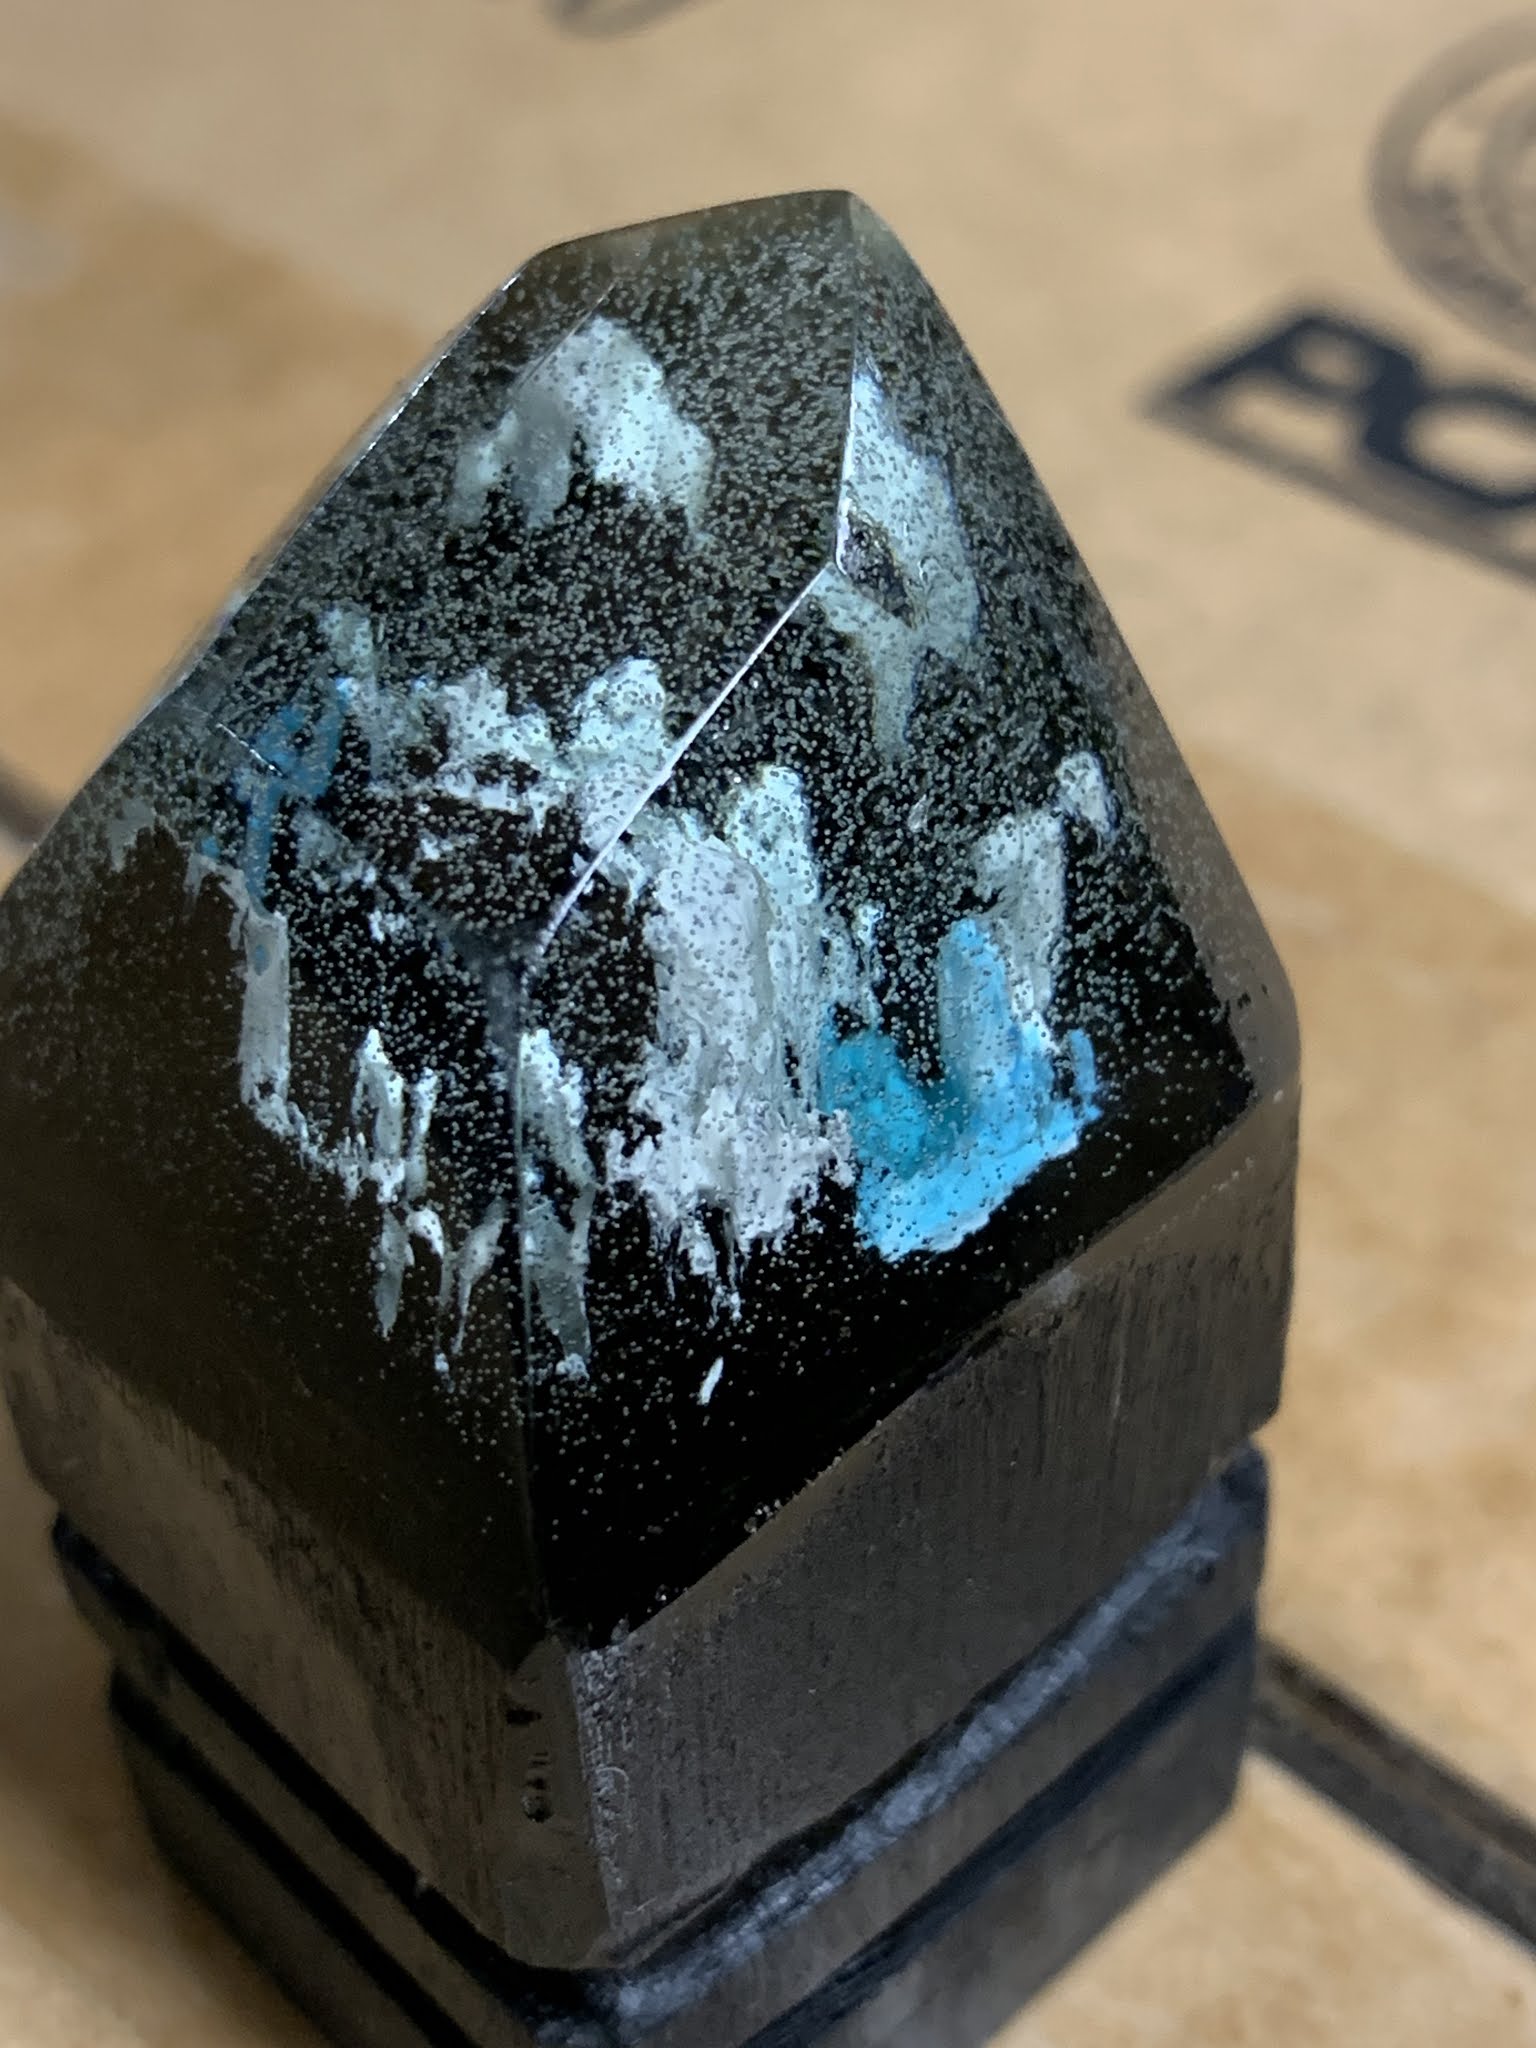
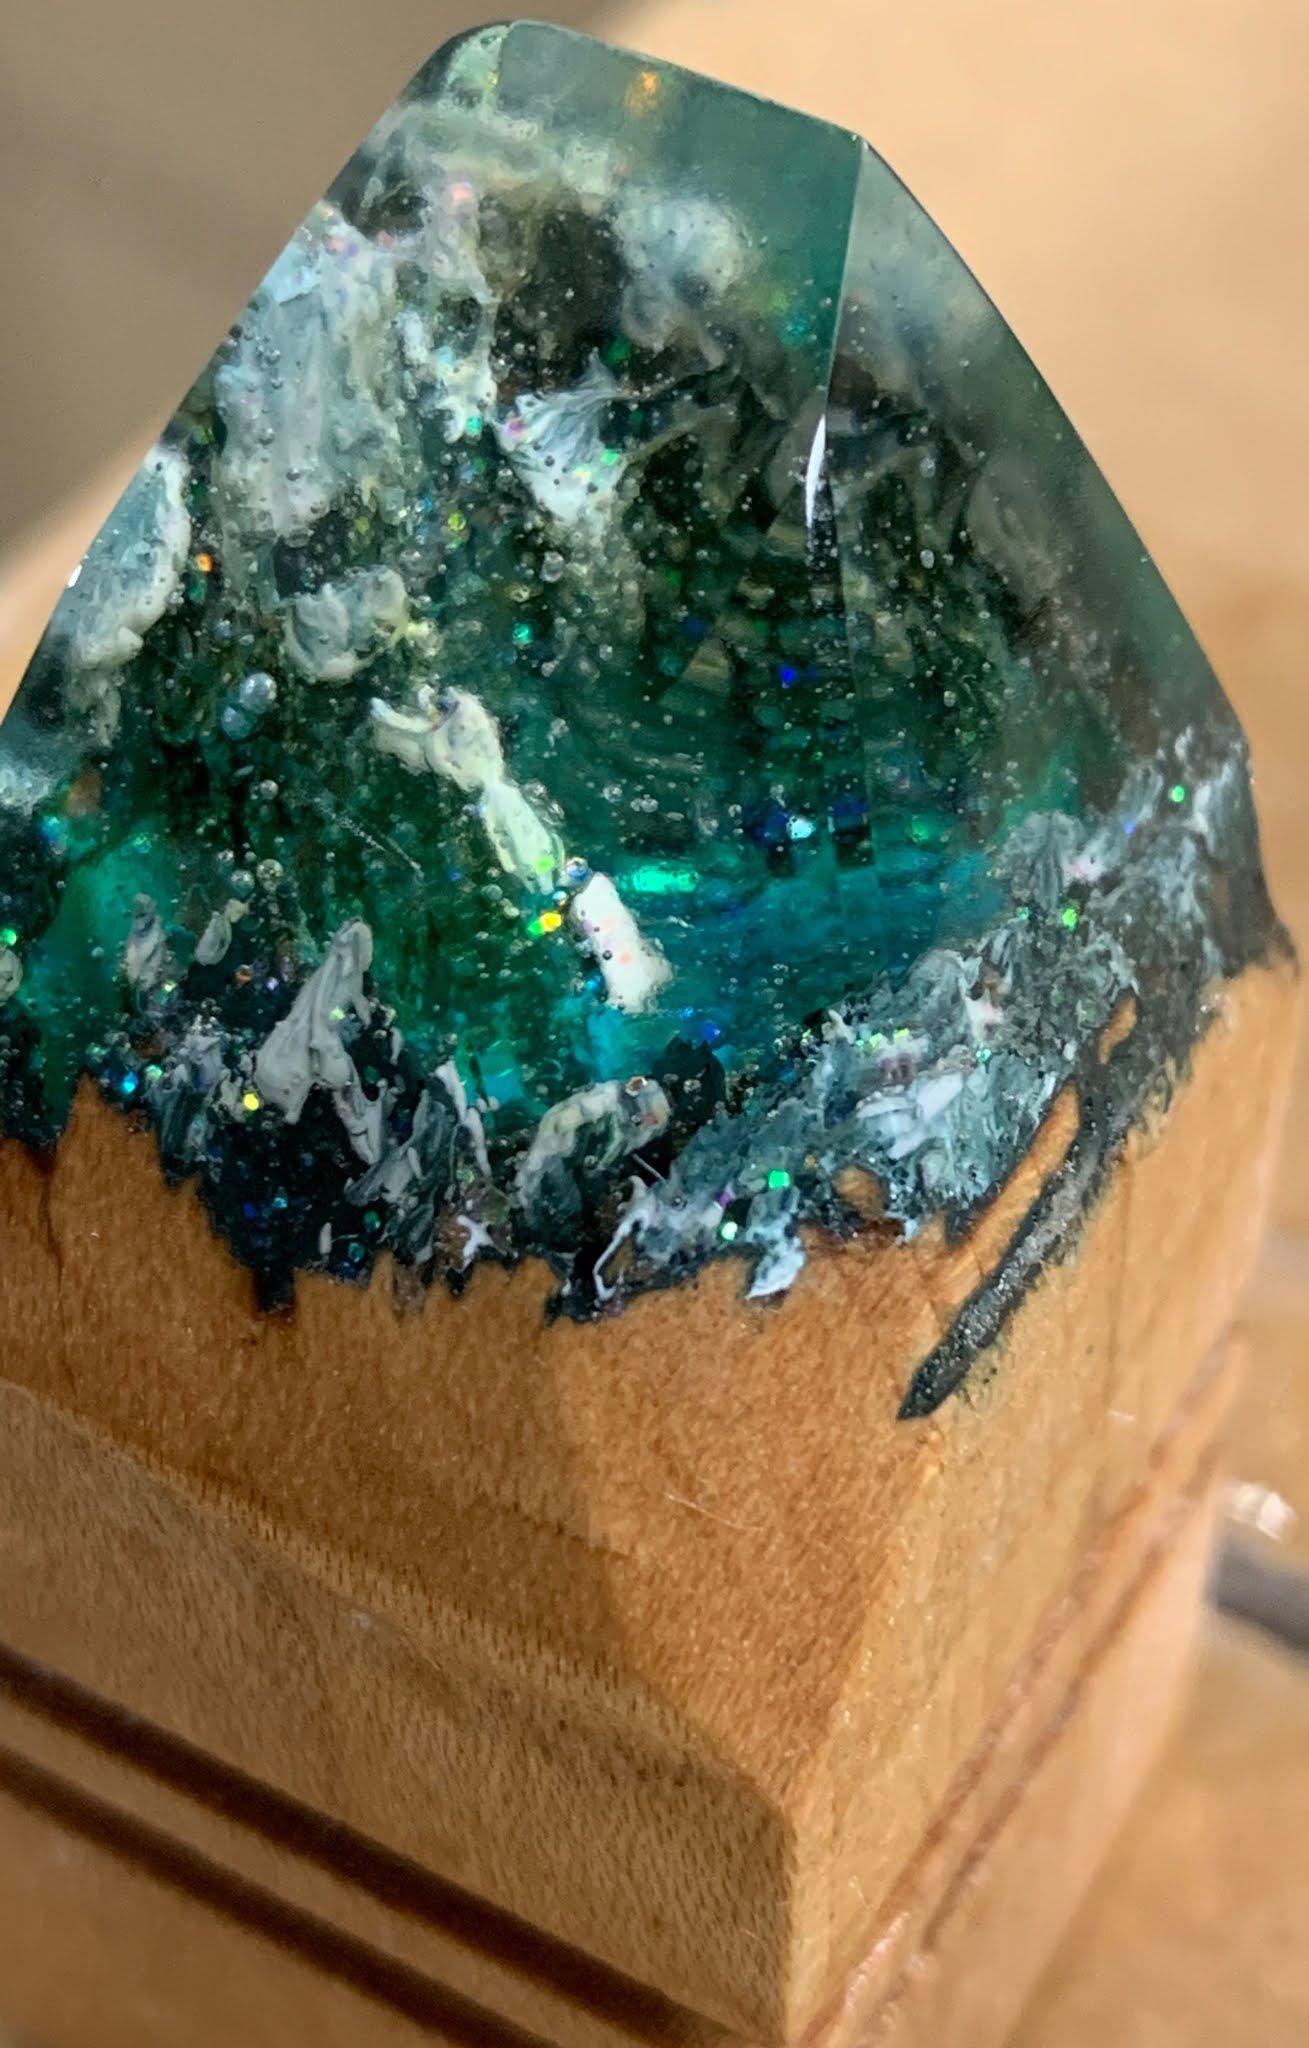

Capstones

These also went through a few design incarnations. The capstones are the linchpin of the end cap locking mechanism, so their design is closely tied to the restrictions imposed by my end cap choices. My early 3D printed designs relied on a plastic tab to lock into a groove on the capstone. This turned out to not work too well with the PLA filament I use. It also didn't feel very elegant. So, I revamped the attachment to be magnetic in nature. The final design uses magnets on both the capstones and the end caps for a secure hold and satisfying thunk.


End caps


I think these are my favorite part of the build. The locking hasp is fun to play with, they look pretty sweet, the 15% infill keeps them light, and the distressed paint turned out well. These end caps pull triple duty by holding the set together, becoming a coaster during play, and feature an integrated game counter so you can keep track of flat count, game wins, or how much your part of the bar tab is :)


So there you have it; a unique travel set with an Artificer theme! Stay tuned for further improvements to this set (I am playtesting currently and then shipping it out to have others give their input).


For my next build:  Fire and Ice themed 5x5/6x6 hybrid to go with my Hidden World capstones.


Sunday, March 7, 2021

Prototyping the Artificer's Tak Set


Hello Takkers!

I'm writing this COVERED in sawdust and metal shavings. My feet are numb and my nose is running from the cold. I have small cuts on my hands, and a blister on my thumb...

And I'm having a great time crafting my ideas into reality!

The idea for the Artificer's Set started as an idea for a travel set that could be played without needing a perfectly flat surface. I mentioned the idea on the Tak Discord and went back and forth with a list of wants. I wanted a fully contained board and piece set that used slats of wood with canvas on one side and the board with attached flaps and a strap to roll up and secure the board with the pieces inside. Here is a sketch of that first idea:

As the discussion evolved and I let my brain ponder the idea, I decided that I didn't like the strap, and was concerned that the end flaps wouldn't accomplish the job in the manner I wanted. So, I came up with a new closure system:
This felt more secure to my mind, though harder to make. But, the more I thought about it, the more I realized the sliding hook pin would get in the way when rolling up the board. I had to find a way to get it to hide away when not in use. And I found the answer while driving for work. I was mulling over the problem when it finally came to me. These little sparks of inspiration make it all worth it! I designed this in my head while on the road, and then sketched it out at my next stop:
I wanted the end caps to be functional outside of holding the set together. Gruppler gave me the idea of making them into coasters. Then, building on this, I added a game dial to keep track of wins. After more tweaking and thinking, my idea came to resemble this for the end caps:

The first prototype was a moderate success. It did it's job of showing what works and what doesn't. I had originally designed it so the board wrapped over itself to make a tight enough roll to comfortably pick up with one hand. But, the extra thickness in the overlap area required an offset center "coaster" which then messed up the aesthetics and the game dial function. My options to fix this were to make the end caps bigger to remove the overlap, or reduce the board size. I settled on the latter to keep the set size more compact.


Here are 2 short videos of my progress:

Opening

Closing


And....I just bought a 3D printer! So, stay tuned for my further development with that new tool.


Thanks and enjoy!!

Tuesday, February 2, 2021

Experiments - Muwhahaha!

 Okay, maybe not those kind of experiments :)

I started working with resin a couple years ago, when the USTA tournament wooden capstones started breaking and we needed sturdy replacements. Since then I've worked on some variations using that design and used the results as prizes.

Recently, I decided to take my capstones to the next level. These are much harder to craft (they currently take 4 sessions instead of 1), but I'm happy with the results so far.

These are still prototypes, as I'm getting a feel for working with the harder woods and new resin techniques. Previously, the majority of my woodworking experience has been construction projects with pine and plywood. So, changing that to working on a small, hardwood capstone has lead to some adaptation in tools and technique, and a trip to the ER get a few stitches *facepalm*

Enough backstory :)

Hidden World: Ice and Fire Capstones (ebony and maple) (ignore the amateur photography)


Here are some more pics which include a couple other capstones.


And, lastly, my humble proof of concept that started it off.


Let me know what you think.

These will probably be used for upcoming prizes, so keep your ear to the ground.

Thanks and enjoy!!